Connecting the Coordinator
The Coordinator Board
There are two types of nodes in the Sense/Stage world: end-points, and coordinators. The coordinator is the node that connects to your computer and is responsible for routing data between all the sensor nodes in your network. All of your sensor nodes are usually end-points - they gather sensor data and communicate it back to the coordinator so that you can do something with it.
The coordinator node consists of two parts: 1. an XBee radio chip and 2. an XBee interface board like the Sparkfun XBee Explorer USB. The interface board has a USB connection which you connect to your computer, the coordinator will then show up as a USB device that you can select in Pydon before starting your network.
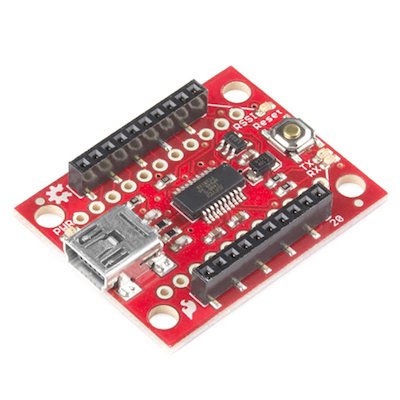 Sparkfun’s XBee Explorer interface board
Installing FTDI Drivers
Most interface boards (including the Sparkfun one) uses a little chip made by FTDI to convert the XBee’s serial protocol to USB that your computer can easily connect to. You most likely will need to install the virtual com port drivers from FTDI before your computer will recognize the coordinator as a USB device.
You can download the VCP drivers directly from the FTDI website. Mac users should download the most recent driver for their OS version. Windows users should download the ‘setup executable’ that is available through the link in the comments column to the right.
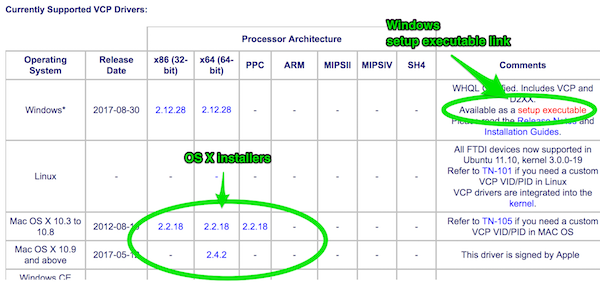
Connecting the Coordinator
Once you have installed the approrpriate FTDI drivers, you can connect the coordinator board and have it be recognized as a USB device by your computer. Before connecting your coordinator to your computer, make sure the XBee is seated properly on your interface board. On the Sparkfun XBee Explorer the angled side of the XBee should be pointing away from the USB conenctor.
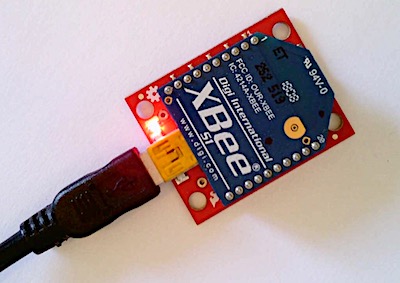 The coordinator node with the XBee seated in the correct direction on top
Connect the coordinator to your computer using a USB cable. You should see the red power light turn on.
Note!: The XBee radios are specially configured to behave as an end-point or a coordinator. If you purchased a Sense/Stage kit, these XBees are already configured for you. Just make sure you put the coordinator-configured XBee on your interface board! For more information on configuring XBees in a Sense/Stage network see the guide on configuring XBees for use with Sense/Stage.
Finding the Correct USB-serial port in Pydon
Once you’ve connected the coordinator, assuming you’ve correctly installed the FTDI drivers it should be recognized as a USB device on your computer. Open up Pydon and you should see it in the Serial Port drop-down list. The serial port name will look a bit different on OSX and Windows.
USB device on Mac
On OSX the serial port will have a name with the word usbserial in it.
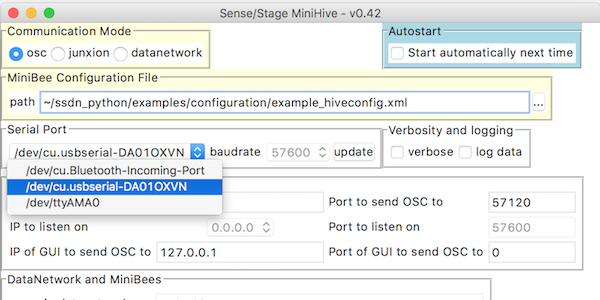
Select this device and click on the start button to start your wireless network. If everything goes well the Pydon feedback window should display some text, including the following lines that tell you the serial port was opened successfully.
...

trying to open serial port
('Opening serial port', u'/dev/cu.usbserial-DA01OXVN', True)
initialising communication through serial port

...

Created OSC listener at (0.0.0.0,57600) and OSC sender to (127.0.0.1,57120) and
opened serial port at /dev/cu.usbserial-DA01OXVN.
Now waiting for messages.
If you have issues. Try shutting down Pydon and then reconnecting your coordinator node. Then start Pydon again and reselect the serial port.
USB device on Windows
On Windows the serial port will have the word COM followed by a number. There might be a few COM options in the drop-down list if you have some other USB devices connected.
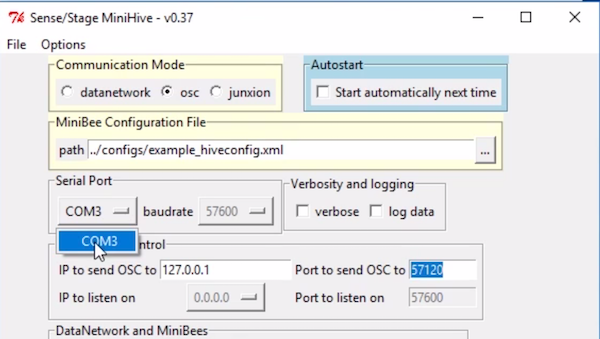
Select the serial com port and click the start button to start your wireless network. If everything goes well the Pydon feedback window should display some text including a message that the serial port was opened.
If you have issues, try selecting a different serial port (if there is more than one). You can also try shutting down Pydon and reconnecting your coordinator node. Then start Pydon again and reselect the serial port.
