Adding New MiniBees to a Network with XCTU
This guide is intended to help you add new MiniBees to an existing set, or to create a completely new network. There are a couple of things you need to do to make this happen.
- If you are adding new MiniBees to an existing network, you will need to configure the XBee radios on the new MiniBees to have the same channel and PAN ID as the rest of your pre-existing network.
- If you are creating a totally new network, you will need to decide on a channel and PAN ID and program all the XBee radios of your network accordingly. You will also need to program the coordinator XBee with a special coordinator configuration.
- Finally, you will need to create a pydon configuration file containing entries for all the sensor nodes in your set. See Connecting a MiniBee for the first time.
*Note* If you have older revision MiniBees (probably rev D) and purchased new MiniBees (rev F) to add to your set, you may need to install the latest version of pydon in order to recognize the latest firmware installed on the rev F boards. The older MiniBees (whichever revision you had) can keep the firmware they have. The latest version of pydon is aware of the different features of different versions of firmware and will adapt accordingly. Of course, you can also choose to update the firmware on your old boards to the latest version with the Arduino IDE, but this is optional.
To update pydon to the latest version you can simply overwrite your current version by following the instructions in the getting started guide on installing pydon.
Adapting the channel and pan ID of the new XBee
The channel determines on which radio frequency the XBee are transmitting. The pan id is an identifier within the channel to distinguish different XBee networks from each other. XBees will just ignore traffic that is happening with different pan ids.
Check the channel and pan id of your existing set
Connect your coordinator node with XBee on top to your computer. Follow the instructions to read the settings of your XBee. Note down what the setting is of CH and ID.
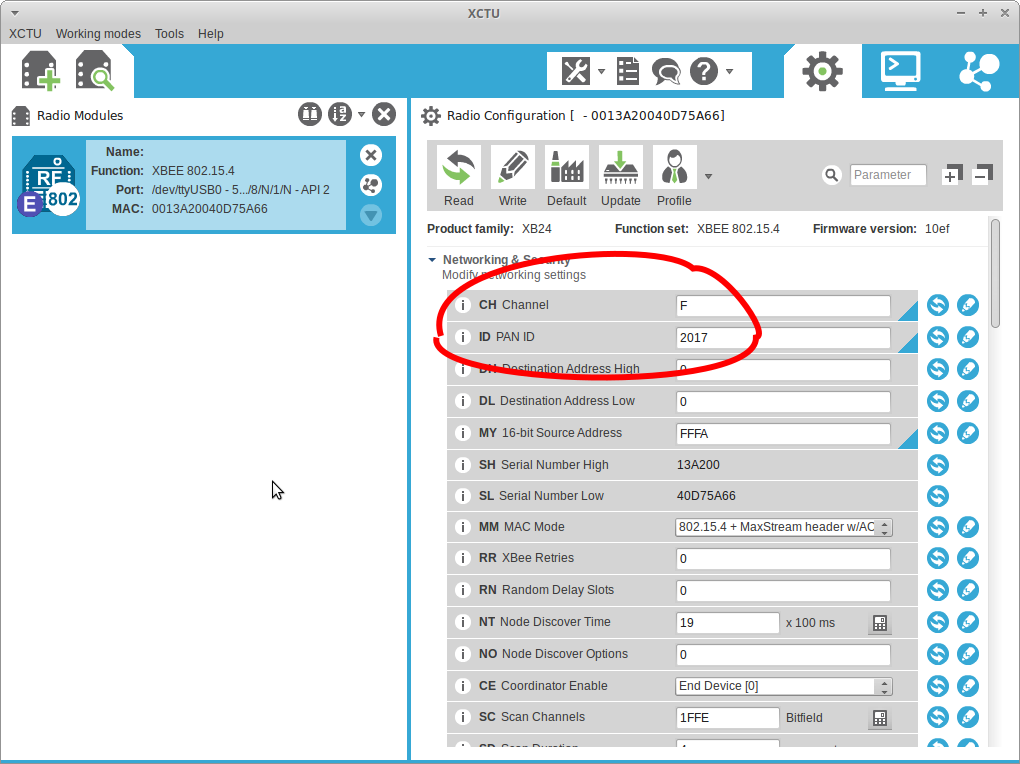
Configure the channel and pan id of the new XBee
Now that you know which channel and pan id your set is working at, you have to configure the new XBee to use that same channel and pan id.
- Take off the XBee from the coordinator node and put it aside.
- Take off the XBee from the new MiniBee and put it on the coordinator node.
- Follow the instructions to change settings of an xbee and program the channel and pan id onto them.
- Repeat these steps for each of the new XBees that you have and want to add to the set.
- Once you are done with all the XBees, put the XBees back on top of the MiniBees and put the XBee that was orginally on the coordinator node back onto it.
Add the new MiniBees to your hive configuration file
Now that the XBees are configured you can configure your MiniBee just like when you connect a MiniBee for the first time.