Preparing the coordinator board to program XBees
To program your XBee you’ll need an XBee programmer board. We recommend the Sparkfun XBee Explorer USB because it has an on-board reset button that makes uploading new configurations much easier.
By default, XBees you purchase with the MiniBees are pre-programmed with sleep mode enabled. This means if you want to reconfigure the XBees on a programmer board without a reset button, you need to make a connection between the DTR and GND pin of the coordinator board to bring the XBee out of sleep mode. If the XBee stays asleep it cannot be reprogrammed.
The pictures below show (circled in red) which connections need to be made on the coordinator boards. It is a very quick soldering effort! You only need to do this if you have a board without a reset button.
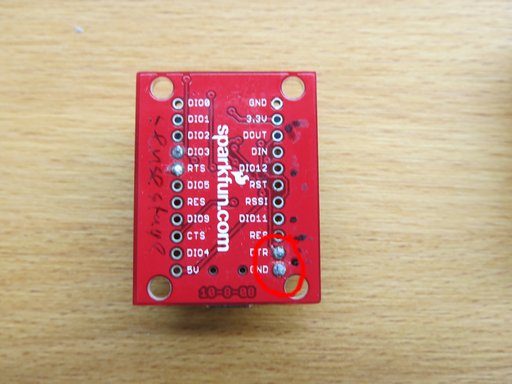
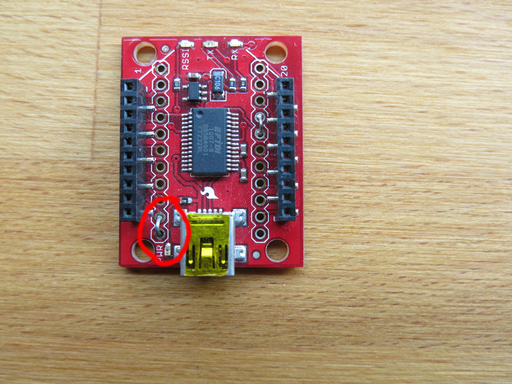 Soldering the connection on the red Sparkfun coordinator board without a reset button
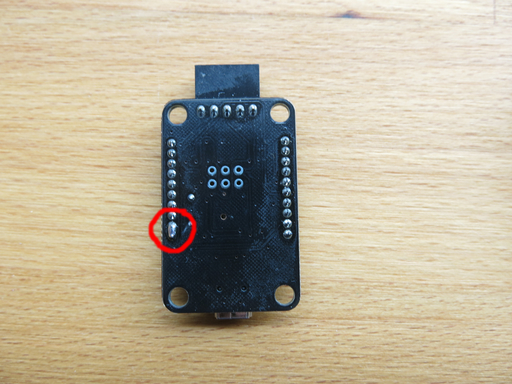 Soldering the connection on the black DF Robot coordinator board
Connect your coordinator board to your computer and connect the XBee you want to reprogram to the board.
*NOTE* if this is your first time using the coordinator board you may need to go download the latest FTDI virtual communication port drivers before continuing.