Loading a profile
At this point you should have X-CTU installed and a coordinator board connected with an XBee sitting on top of it. This step of the guide explains how to load profile files on to your XBees. You should only need to do this if you are configuring XBees for the first time to be used in a Sense/Stage network. If you already have your network set up and only want to change the PAN ID or channel, skip ahead to changing settings.
Loading coordinator and endpoint profiles on to new XBees
When configuring XBees for the first time to use with Sense/Stage, you will need to upload a profile designating the XBee as either a node or the coordinator of a network. This is done by uploading a profile file in X-CTU.
Getting the XBee profile files
The XBee profiles for Sense/Stage are available from this git repository. Click on the Clone or Download button, or use this direct link for a zip-file.
Unpack the folder. The layout of the folders is as follows:
- In the folder
api, you will find the profiles for API mode operation. You should use these unless you have an especially old version of the MiniBee with old firmware on it. - The folder
apiis further subdivided inprowith profiles for the XBee Pro, andregularfor the normal XBee S1 radios. - In the folder
atyou will find profiles for the old AT mode, which were used with older (before 2012) MiniBee firmware. - In the folder
regularyou find 6 files; the ones withcoordinatorin are used for the coordinator board, the ones withenddevicein the name are used for the XBees on the MiniBees.wscoordinator_api.pro- version for old X-CTU softwarewsenddevice_api.pro- version for old X-CTU softwarecoordinator_1155_api2.xml- version for new X-CTU softwareenddevice_1155_api2.xml- version for new X-CTU softwarecoordinator_2017F_10ef.xml- current version with which MiniBee revision F is shippedenddevice_2017F_10ef.xml- current version with which MiniBee revision F is shipped
Loading a profile onto the XBee with X-CTU
We will now select a profile to load. Go with the mouse cursor to the Profile button at the top in the middle. Once you click on it, you can choose between loading and saving a profile.
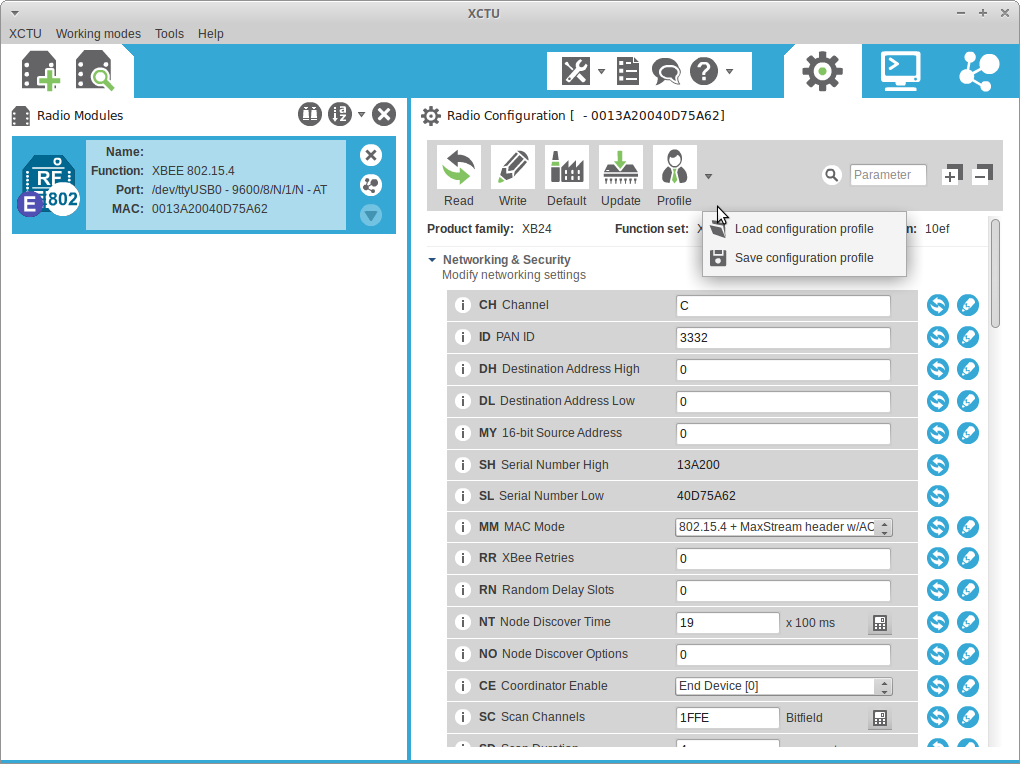
Click on Load configuration profile and browse to where you unpacked the zip-file with the profiles.
- Choose
enddevice_2017F_10ef.xmlif you want to program the XBee for use on top of the MiniBee - Choose
coordinator_2017F_10ef.xmlif you want to program the XBee for use on the coordinator board that is connected to the computer.
X-CTU may give a warning that the radio firmware does not match with the profile and ask for updating:
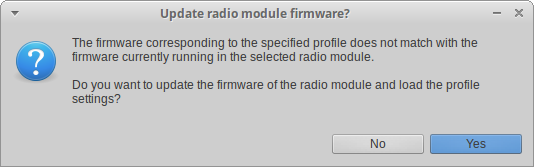
Select yes to do so, especially if it is a new version (higher number), then it will make the performance of the XBee better.
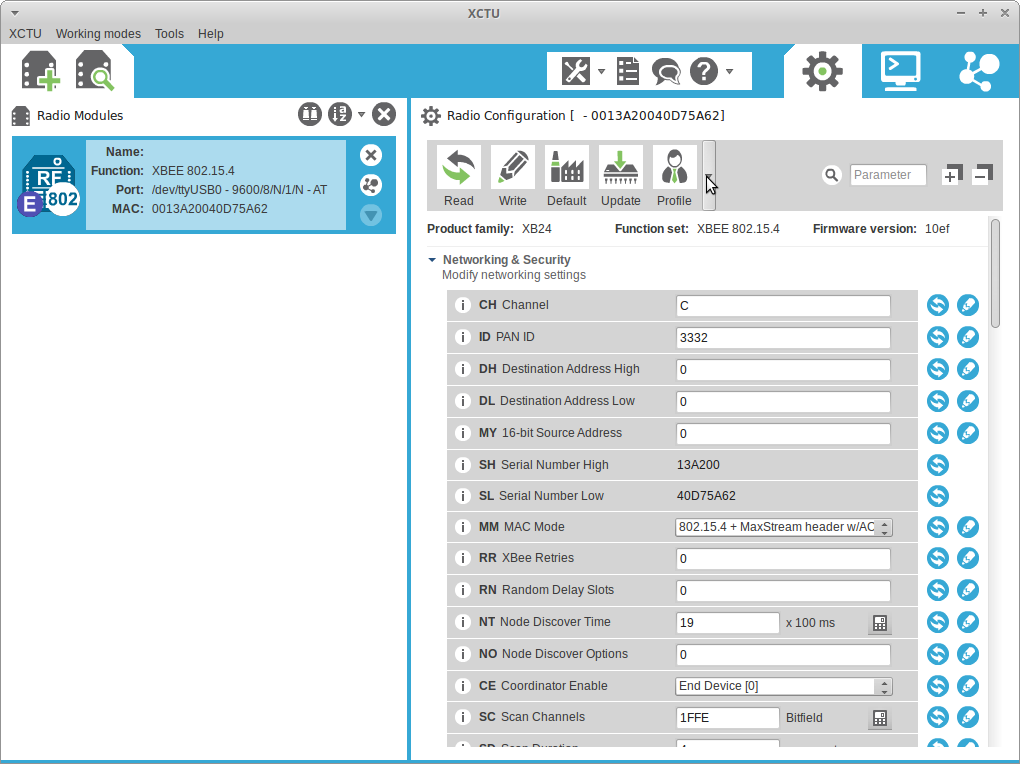
Once you have opened the configuration profile file, the list will show which settings are in the profile. The settings that are changed but not written, have a green triangle in the lower right corner.
Writing the changed settings
You still need to write the settings to the XBee. For this, select Write from the menu, as shown in the screenshot.

You may get a popup window that there are some empty values; don’t worry about this and click ok.
![]()
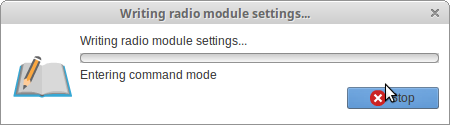
You will get a popup window indicating that the settings are being written:
After writing the values, the triangles that were green are now blue. This indicates that the values are written to the radio, but that they are different from the factory settings of the XBee.

You can now close the radio again by selecting the cross, see where the mouse cursor is in the screenshot:

Now, disconnect the coordinator node from the computer and, if you want to configure another XBee, remove the XBee and place the new XBee on top. And start again.