Unpacking the Sense/Stage MiniBee Kit
A guide on what is in the Sense/Stage MiniBee kit.
| minibee | introduction | getting-started | glossary |
| tags | basics | todo |
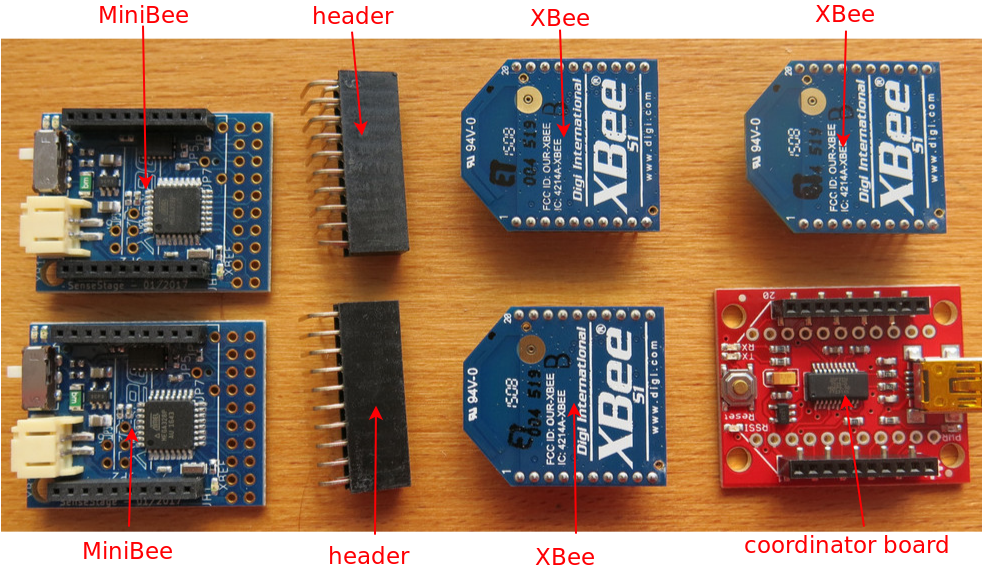
To begin with, you should inspect the contents of your kit. Be able to identify the various parts of the Sense/Stage MiniBee hardware setup. Your starter kit should include the following:
- 2 MiniBee boards including headers
- 3 XBee radios (all but one connected to MiniBees)
- a red coordinator board
- 2 green Xpee expansion boards including headers
- 2 green Xpree expansion boards including headers
You may have also purchased a battery kit, which should include 2 LiPo batteries and a red USB charging board.
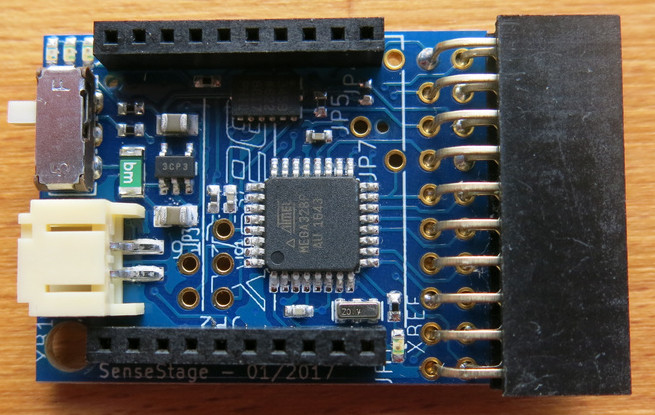
MiniBees
These are the small sensor data capture devices that form the core of the Sense/Stage MiniBee system. If you’re familiar with Arduino, then you’re probably already accustomed to the kind of projects such devices can be used for.
Unlike an Arduino, the MiniBee has a built-in accelerometer and is ready to start measuring motion right out of the box.
In the future you’ll likely want to add additional sensors to capture more phenomena of the physical world.
The standard Sense/Stage kit has 2 MiniBees. In addition, for each MiniBee you should have a black expansion header.
XBee Radios
While MiniBees can operate fine on their own as tiny Arduinos, their real power is in their ability to communicate data wirelessly over a distance.
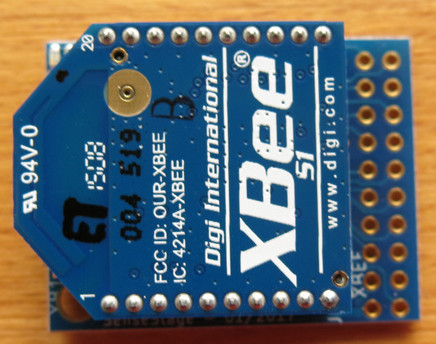
In order to be able to engage in wireless communication, every MiniBee needs to be equipped with a little wireless radio device called an XBee.
All of your MiniBees will come with XBee radios already attached to them, labeled N for NODE.
You should also have one extra XBee to use with the coordinator board, labeled C for COORDINATOR.
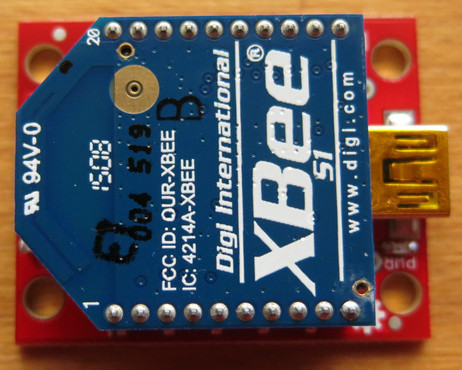
The right way of putting the XBee on the MiniBee:
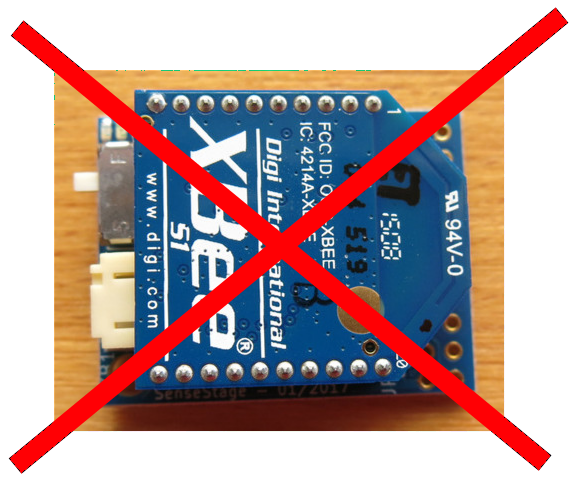
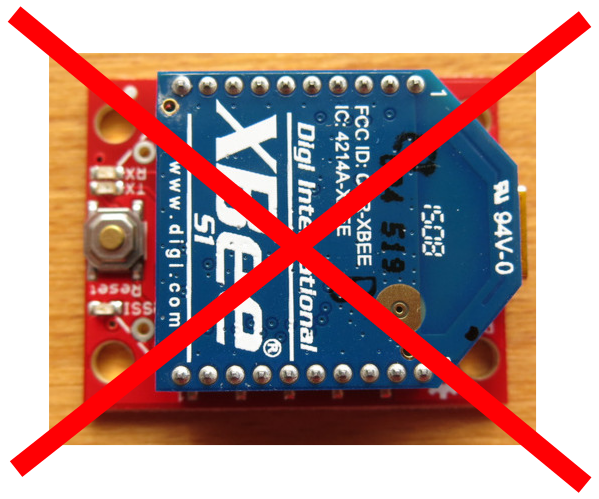
The wrong way of putting the XBee on the MiniBee:
The Coordinator Board
The small red board with a mini USB connector on it. This board must also be equipped with an XBee radio. It will connect to your computer via USB so that your computer can join the wireless conversation with your swarm of MiniBees.
NOTE: A USB mini cable is not included with your Sense/Stage kit!
Putting the XBee on the Coordinator Board
Before you can use the coordinator board you need to connect an XBee to it. Your kit is provided with one extra XBee labled “C” for this purpose.
Be very gentle when attaching the XBee, and make sure you use the correct orientation.
The right way of putting the XBee on the coordinator board:
The wrong way of putting the XBee on the coordinator board:
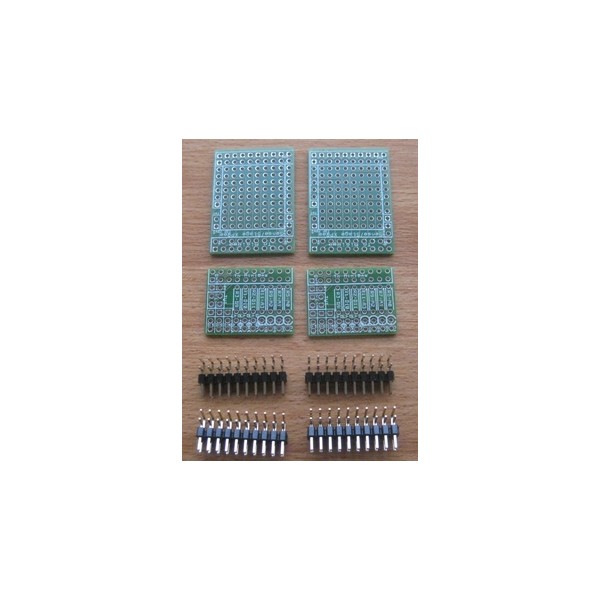
Expansion Boards
Every starter kit comes with expansion boards for adding new sensors and custom circuits to your MiniBees. There are two types of expansion boards: the standard XPree experimentation board, and the simplified XPee.
You should have one XPree and one XPee for each MiniBee in your kit.
Battery and Charger
If you also purchased a battery kit, you should find included two or five LiIon batteries and a red charger with a USB connector.

NOTE Make sure to fully charge your batteries before the first use.
WARNING! LiIon batteries require special handling care. For more information see this useful link from Sparkfun.com.
Related pages:
| minibee | introduction | getting-started | glossary |
| tags | basics | todo |
| page created on: | last changed on: |
|---|---|
| 6 February 2017 | 6 February 2018 |